
0
Answered
How to build OpenICE source on BBB
Hi, guys!
I was installed Revision C Disk Image and gradle-2.4 and sync to a NTP clock on BBB.
but, jdk 8u33 in Rev.C disk image is not build OpenICE source on BBB. (./gradlew)
The reason is 8u33 is not supported JavaFx. so I reinstalled jdk 8u6.
but OpenICE source is not build on BBB....
I want to build OpenICE source on BBB.
help me how to build OpenICE source on BBB or build reference.
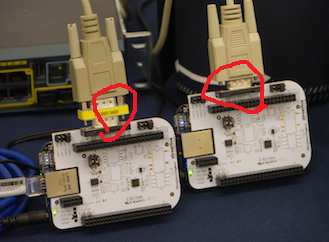
p.s - Your device adapter(BBB) have a rs-232 serial port. my BBB don't have a serial port. T.T
thanks
Hyungi
I was installed Revision C Disk Image and gradle-2.4 and sync to a NTP clock on BBB.
but, jdk 8u33 in Rev.C disk image is not build OpenICE source on BBB. (./gradlew)
The reason is 8u33 is not supported JavaFx. so I reinstalled jdk 8u6.
but OpenICE source is not build on BBB....
I want to build OpenICE source on BBB.
help me how to build OpenICE source on BBB or build reference.
p.s - Your device adapter(BBB) have a rs-232 serial port. my BBB don't have a serial port. T.T
thanks
Hyungi
Customer support service by UserEcho

First, I do not recommend building the source code on the BBB itself. Build the source on your main computer and then transfer to the BBB. This process has been automated by the buildAndDeploy .sh procedure. The recommended process is as follows:
- Copy the OpenICE BBB disk image to the the BBB following the instructions here: https://www.openice.info/docs/4_device-adapter-setup.html.
- Enable SSH to the BBB from your main computer without a password. You can either generate a key on the BBB and copy it to your main computer or, alternatively, copy your main computer's SSH public key to the BBB. Please consult Google for help with SSH keys. The purpose is to allow the buildAndDeploy .sh script to transfer the build to the BBB without a password.
- Ensure the BBB is on the same local network segment as your main computer. Copy the BBB's IP address to the "targets" file in the mdpnp repo on your computer. The targets file is found here: https://github.com/mdpnp/mdpnp/blob/master/targets. Comment out all other unknown IP addresses.
- Run the buildAndDeploy.sh script on your main machine. The script can be found here: https://github.com/mdpnp/mdpnp/blob/master/buildAndDeploy.sh. This script will build the source code with ./gradlew, compress, transfer and install the build.
Second, BBBs do not have RS-232 serial ports. To connect an RS232 serial port to your BBB you will need a serial cape. Serial capes can be purchased from many distributors world-wide. My preferred cape is from Logic Supply http://www.logicsupply.com/cbb-ttl-232/. The instructions for configuring a BBB are found here: https://www.openice.info/docs/5_device-adapter-config.html.Thanks,
Jeff
I was follow your suggestion.
Thanks,
Hyungi
In short, there is no GUI when OpenICE is run on ARM - JavaFX is no longer supported.
But that's okay! We don't typically run a GUI on ARM anyways (It's very, very resource heavy). Check out this page: https://www.openice.info/docs/6_example-setups.html.
As you probably know, OpenICE has two operating modes: Supervisor and Device-Adapter. They are both kept in the same mdpnp repo for convenience. The Supervisor has the ability to run apps as well as start separate Device-Adapters (both real and simulated). The Device-Adapters are meant for integrating medical devices into a network so that a Supervisor can use data from that device. The Device-Adapters are typically run "headlessly" i.e. without a GUI. A Supervisor on the same network as a Device-Adapter is used to view and analyze the data. My recommendation is that BBB (ARM chips in general) are used only to integrate devices headlessly as shown in the "example setups".
To start the Device-Adapter on the BBB without a GUI, use the following on the BBB command line:
Follow the instructions found here: https://www.openice.info/docs/5_device-adapter-config.html#configure. Note that the -address is the Unix device from /dev/ that you're medical device is plugged into. For a BBB connected to RS232 on UART0 (debug console on J1) the corresponding /dev/ is /dev/ttyO0.
To start the Supervisor GUI and view the data from the Device-Adapter, either click on the OpenICE icon (instructions here) or enter the following on your main computer's command line:
Use the Supervisor GUI to select Domain 15 and launch the Supervisor.
Thanks and let me know if you have anymore questions,
Jeff
Thanks for your answer.
I understand course of OpenICE on BBB and main computer.
Perhaps, can i running for "demo simulator" on over course?(not connect to medical device)
Example) running Device Adapter modes on BBB - view "demo simulator" on main computer.
Always thank you for answer my lack skill at English,
Hyungi
My question was solved.
Thank you,
Hyungi
Set only domain ID, how to see the simulation on main computer?
Can i see the reference documents of this course way?
Thanks,
Hyungi
I'm sorry but I'm not sure what you are asking. Here is the documentation for the Device-Adapter configuration.
The command line usage for ./path-to-OpenICE/bin/OpenICE is as follows:
Thanks and let me know how I can help you further,
Jeff
Thanks for your answer.
My question is -> I have to know communication between BBB and OpenICE App need rti-dds.
I'm not install rti-dds. but I'm BBB and OpenICE App communication for success.
(useage Multiparameter)
How to communication for BBB and OpenICE App?
Thanks
Hyungi.
RTI-DDS is bundled with OpenICE and is used for communication between all OpenICE system nodes natively (device-adapters, supervisors, simulators, etc. no matter where they are running).
For a detailed description of how DDS is utilized in OpenICE, please read OpenICE App Architecture Description.
Thanks,
Jeff
Thanks for your Answer.
Good day!
Hyungi
I got a problem when i install Revision C Disk Image in BBB. I just copy the Revision C Disk Image intto MicroSD card and insert the MicroSD card into the BBB,then plug in the BBB power supply, but things goes not like the docs,the BBB's memory was not flashed successfully.so can you give me some help? Thankyou~
zhangtan
Thank you for your attention! I think i failed to install image in BBB. After i insert the MicroSD card into the MicroSD card slot and plug in the BBB power supply ,the BBB start to run and the four LEDs illuminate successively,after a while the USER1and USER 3 extinguish and the USER0 and USER2 keep illuminating all the time. But the docs says"When flashing is complete all the LEDs will illuminate and some finalization steps will occur. After another minute or two the LEDs will extinguish and the beaglebone will power down" so i think i failed to install image in BBB, but i have no idea what goes wrong.
Thankyou!
Zhangtan
I understand your problem.
I hope I can see the display screen information.
In my case, When the image starts copying onto the BBB the four LEDs will illuminate successively from end to end. after the installation is complete, all LED turns on, does not automatically reboot.
Did you add a "boot" option to copy the image to the MicroSD card?
If you add a boot option, i'm suggests one way to you.
After pressing the button, plug in power.
I'm sorry to my lack skill at English,
Hyungi
I think i should learn more about the BBB.I just install the drivers of BBB in my computer(windows7 system),and connect BBB though putty.Just like:
I don't konw how to add a "boot" option to copy the image to the MicroSD card,i just copy the Image file into the SD card .
I can't watch the video you suggested,can you just give me the URL?
Thankyou!
Zhangtan
Seeing your uploaded screenshot, image installation is successful.
Umm.. blocked youtube in china..
I gave the address of the url is www.youtube.com/watch?v=-UuNNiwHWFU
Is there other problems?
Hyungi.
I get confused.what do you mean" image installation is successful"?The image file is just copied into the SD card,but not successfull flashed into the BBB's memory.And what do you mean "add a boot option to copy the image to the MicroSD card". Thank you for the url, i will try to watch this video.
Zhangtan
I'm using software 'rufus'
add a boot option means :
i'm suggests add one way to you.
http://www.crashcourse.ca/wiki/index.php/BBB_software_update_process
Thanks and let me know if you have anymore questions,
Hyungi.
I just watched the video and try to press the Button then plug in power. But still "the BBB start to run and the four LEDs illuminate successively,after a while the USER1and USER 3 extinguish and the USER0 and USER2 keep illuminating all the time"
Thank you for your new suggestion. I will read it.
Thank you so much!
Zhangtan
I use Rufus to write the image into SD card and make the SD card into a startup disk.Then i pressed the boot button and all the things goes like the docs says.Thankyou so much.
Zhangtan.